Wednesday, July 16, 2014

Well, it's been awhile, but we're back!


It would seem that some catching up is in order.  A lot has happened in the last 16 months since something happened on this blog, partially due to technical issues, and partly because in posting things on Facebook, I'd forgotten temporarily that they weren't showing up here.  So... a quick review of some of the more interesting happenings on the Slate Creek Railway in the last ... well, year or so.

Getting Plastered


The guys you met in the last post, Steven and TJ, have become the regular scenery crew at the SCRY.  Which is to say that on a semi-regular basis, they come up and help me make a mess, and mountains tend to appear.  Here's some of our recent work ...

Progress in the Canyon area:


There *is* a real bridge on the property for this location, but until I have it detailed, and the scenery around it finished, the temporary one is easier to remove, and it won't matter if it ends up covered in paint, plaster, and scenery materials while the area around it is finished.


Progress in the Mill area:


And, the area from the Tunnel to the Mill:


Progress in the Mine area: 


If you're keeping score, you may now realize that this means there's hardshell up on ALL of the mountain areas on the railroad!  I could not have done this without all of the folks who came in to help, and were willing to work for the price of some bad jokes, some good food, and some flying potatoes (don't ask...) and who even without owning even part of the railroad continue to be dedicated to my actually finishing something ... someday!  Thanks guys... really!  Now let's talk about finishing techniques, and SCENERY!

Motive Power

While there are a lot of very interesting projects in the works on the Slate Creek, two bear mentioning at this point because they are either operational, or at least making good progress.  First is the arrival of Slate Creek #6, the heavily modified Bachmann 2-6-6-2 featured just before the long gap in articles here, and the Diesel project.  Number 6 has arrived on the property, and awaits final detailing and decals, but after some initial tweaking is serviceable, and can pull trains of impressive lengths, even around the many curves on the Slate Creek.  Here's a demo video, which, while poorly lighted will give you the idea . . .


As to the Diesel, it's been a learning experience from A to Z.  Well, ok, from A to about M right now .... still with M-Z to go!  Mr. Alan Friedland of Great American Locomotion ( http://www.thegalline.com/ ) has been an enormously helpful and encouraging resource and supply of parts, spare parts, replacement parts for ones I broke, and patience as life interferes with the project which has now taken a year or two longer than expected!  We *are* making progress, though, and I'll show you a couple of photos here:

 
There was a problem with the deck discovered after these photos were taken, requiring that I start over again and ensure that the "donor" deck was sanded perfectly flat ... there should be photos soon of the new improved version soon (and by "soon" we mean before another fourteen months go by!)

For those of you just catching up to this project, Alan has helped me realize a concept of making a new superstructure for the Bachmann 45 tonner that makes it into a 1:20.3 sized diesel made from the plans for the Southern Pacific Narrow Gauge #1 (The "Little Giant") that is quite close, except that the shorter 45 tonner frame means  the locomotive is a bit too short, over its length.  Stay tuned ...

So Many Projects .... So Little Time ....

The last year has been very busy, and provided several interruptions to all things Slate Creek.  From family emergencies to work projects (you know, at work...!) there has been a LOT to do, and very little time for the basement.  Currently the sidings at Midway are being rebuilt.  The original plan had a very short passing track at the station, with two stub sidings.  As pointed out by Doug Matheson nearly 10 years ago, the passing track was too short, and the stub sidings weren't going to hold much... what I needed was a longer passing siding running all the way through Midway.  Well, the old has been pulled up, and the new is going in!  Photos from that change will follow in their own article, as soon as it's done.... hopefully soon, as until it's finished, we're back to a point-to-point operation.    But at least this time we can try to keep the blog a bit more current, right?

Wednesday, March 6, 2013

There Be Steam Here!

Well, it's not much of an update, and it unfortunately shows the "boy have we got a long way to go" part of the layout more than anything else ... but hey, we *do* have a steam engine in working order, so it seemed a propos to put up a video of it working.

So, without further ado, here's Slate Creek Railway #9 on its first full test run ....


Tuesday, February 12, 2013

And, Speaking of Steam ...


Slate Creek #9 is currently in transit from its former home in California.  When it arrives at the end of this week, it should be ready to go into service, and is already fitted with Radio Control and a chuff resonator.  Plans eventually involve some cosmetic work, working headlights, a whistle, and SCRY graphics on the tender; it'll remain #9 and trade places with #3 in the SCRY lineup, which will now be assigned to the Bachmann 2-4-4T Forney, still under reconstruction. Live Steam has been absent from the SCRY lineup since 2004 when the 0-4-0 "Ruby" met with an unfortunate accident and was removed from the roster.  When #9 arrives there will be more photos and hopefully some onboard video added to this page . . . stay tuned!

Tuesday, January 29, 2013

Building Steam

There are big things happening at the Slate Creek!  Thanks to some new helpers, and some new resolve, there are now plaster hills and cliffs on about 70% of the railroad.  My new "crew" has a particular knack for speed and completeness, and I'm guessing in the next couple of sessions, we're giong to have the hardshell bascially done for everything that is ready for it.  My next big track project is to cut in the switches and sidings for the mine and the crush plant, and to finish the hillside for the one section of the layout that not having those in place has held up. 
(A *BIG* thanks to Paul Weiss, my senior scenery engineer, for the suggestion regarding using basketballs cut in half as plaster bowls ... the necessity of using multiple buckets (and banging on them) has all but been eliminated!  Once the hardshell is up, we'll start landscaping, and then, there will REALLY be something to see. 

Other projects include staining all of the ties for the high bridge, and assembling the bridge deck ... hopefully by the time that's complete, the gap and abutments will be in place, and the terrain installed around them.  For those of you following from the beginning, that means that for nearly one whole side of the layout, the scenery will start a foot or two above the floor and go all the way to the ceiling!

In the rolling stock department, there's also big news.  The last live steam on the Slate Creek never actually saw service on the "Mark II" layout.  The Accucraft Ruby brought from Connecticut was last run as a school demonstration, and shortly thereafter fell into the "Old Richmond Gorge" and was written off as a loss by the SCRY's underwriters, who felt that without the proper boiler testing facilities, that steaming up the potentially damaged boiler would be a mistake.  So, for the last 8 years, there have been several steam locomotives on the roster, but no actual live steam engines, with the idea that live steam would one day return, in a form suitable for pulling actual full size trains with its stablemates. 

We're pleased to report that negotiations are now underway to obtain what would become SCRY #9 (the former designee for #9, the 2-4-4T will become SCRY #3, originally reserved for the next live steam engine) Considerably larger than the previous Live Steam locomotive, it's expected that #9 will be large and reliable enough to pull the same caliber of regular trains as her stablemates.  As soon as arrangements are finalized, there will be photos and information here!

Oh, and watch this space:  While it probably won't be done in time to qualify as an official part of the Large Scale Central winter build challenge, we do have an "also ran" entry coming, for your consideration.

So, at last, there's lots going on!

Wednesday, November 7, 2012

Slate Creek #6 nearing completion

Several years ago, I purchased one of the very first available Bachmann 2-6-6-2's.  At the time there was a great deal of discussion about the locomotive, it's prototype (or absence thereof) and a number of technical details that meant, all politics aside, that I'd need to make some changes if the locomotive was going to be what I wanted it to.

Because most of those changes were a bit over my head, with respect to actually accomplishing them, I found some experts who were willing to help.

The result is ... well, stunning ... and it's not even finished yet:


Slate Creek #6 now has a new cab and tender (from a B-mann 2-8-0) and a lowered cab deck, modified trailing truck, and has been altered to lock the rear engine assembly in place. The front engine has had the motor moved back to the rear of the block, and pivots on the front engine (effectively converting the locomotive from a "Meyer" style to a true "Mallet" style locomotive.) The eccentrics have been reset, and the eccentric rods replaces with custom fabricated stainless steel ones that alter how the valve gear action works, and looks.  The locomotive is now equipped with battery power, radio control, and sound (with magnetic triggers,) and is currently being tested to optimize the new systems.  Left to do:  Lettering, and details, which will happen once the locomotive arrives on Slate Creek rails ... an event that will quite possibly be the longest trip EVER for a model from point of sale to user!


I've got a thread over on Large Scale Central on some of the nuts and bolts of the conversion ... you can see "how it happened" at http://www.largescalecentral.com/LSCForums/viewtopic.php?id=17331

That's enough for one day.  More soon, including a preview of coming attractions in the Diesel department, lots and lots of plaster and dust, and some heavy metal ... well, bridges, that is.


Some news now, and more to come.

It's been a long time since I posted here.  So long, apparently, that the blog changed hands (and now belongs to Google like everything else on the Internet) and so did how to write articles, and, maybe most critically, how to sign in!  But ... after quite a long time trying, we now have full control again.  There's been quite a lot going on at the Slate Creek lately, so I'll do a quick couple of posts now, with more to follow soon.

Thursday, March 24, 2011

PROGRESS!

It's been a long time since much noteworthy progress happened on the Slate Creek, at least that could be published here. Certainly there have been model railroad projects in the works (some of which will soon appear in these pages) but the railroad itself fell behind mostly because of the overwhelming size of the task of building the hardshell scenery. The Slate Creek takes up most of a 40x40 foot basement, and has a hardshell "hillside" from one to three feet high for most of its length!

This week, we had a visit of state from Mr. Paul Weiss, who has the distinction of being the Chief Civil Engineer from the Slate Creek (Mark I) and with his help, we finally have something to show you!

Now, the Slate Creek is primarily a loop railroad, so, starting from the pier and working clockwise around the main line is officially "Timetable North." Place names are simply working titles (though some will probably stick) and for now are really only designed to help visitors figure out where they're standing!

The scenery construction started at the "North" portal of the tunnel, entering the canyon area, and has now progressed through the "Big Cut" at the end of the canyon, around the curve to Midway, past the turn north of the station, and along the back side of the layout to High Bridge, and around the curve to the south switch for the Mine area. The south portal of the tunnel is immediately opposite the south Mine switch on the layout (though, in the "real world) the two would not be near each other, and when the scenery is complete will look like the two totally different places they are.

So, without further ado, the tour!


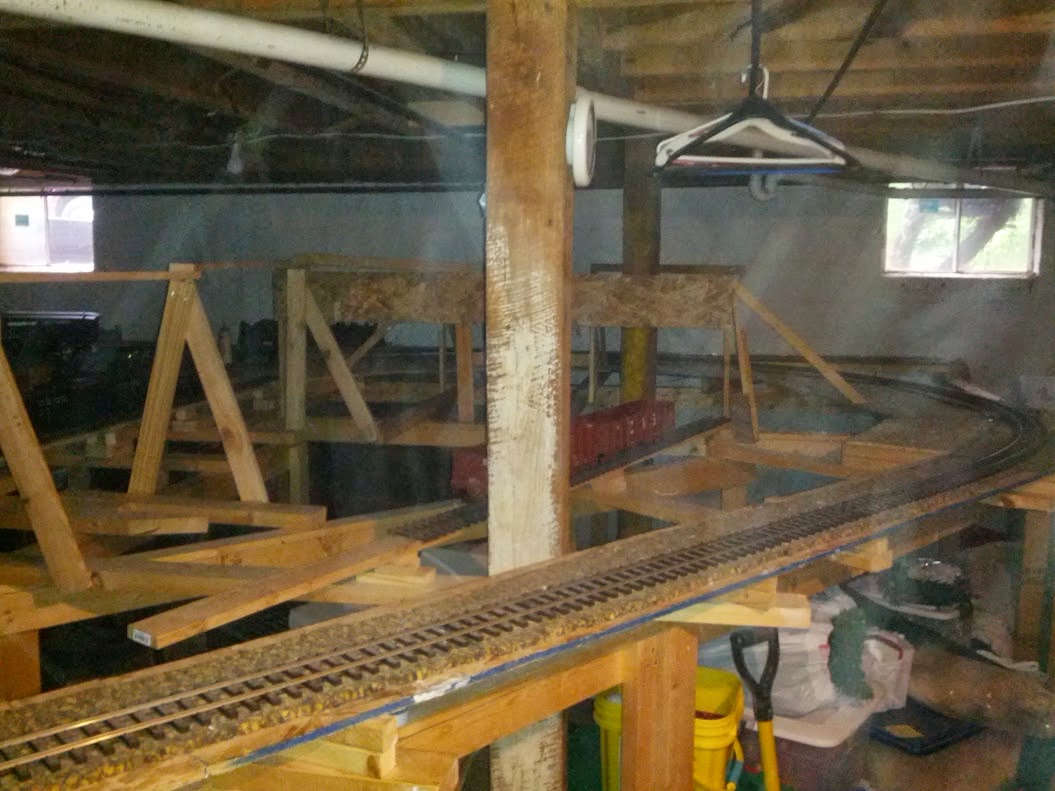
Here you see the line immediately north of the "Big Cut" This is roughly the area seen in the last couple of photos in the previous post, and has some difficult geography; the hill had to be specially shaped to allow a hatch in the "ground" to allow access to the central air unit for the second floor of the house which is directly above this area on the ceiling!


In these two photos, you see the area to the north of the Midway Station, from two different angles, and, a kind of "Before and After" effect. The hillside is made from wire mesh screen on a wood framework, which, once built has layers of Hydrocal (plaster) soaked paper towels applied, and then a finishing layer of Hydrocal. The "before" photo also features our Chief Civil Engineer hard at work ... Thanks Paul!


This photo shows the area just north of Midway and toward High Bridge. The track, for the most part is out of range of this particular shot, being below the photo and to the left until it starts to come back in toward the wall just before the bridge. This area will have the depot rd, and possibly the church... time will tell. The missing corner section has been screened in, and is awaiting plaster along with the rest of the scenery north of this point.


Here you see the future location of High Bridge, one of the few locations on the layout with scenery to be built significantly below the grade of the track. As the plaster is not yet installed, you can also see into the tunnel interior, which comes out at the bottom of the "canyon" area.


The screen currently ends here, at the south switch for the Mine area. The lower terrain makes it possible to see people coming down the stairs when I'm in the shop area, and is one of the only places on the railroad where you can see "someplace else" from any other area ... even if that's not supposed to be possible. It also allows some scenery elements that might not otherwise be available because most of the "walls" are so steep elsewhere on the layout. I kept it this way because it reminds me a little of the old Edaville, where if timed properly, outbound trains could see the inbound trains as they rounded the sharp turn at the Rusty River... even if, for purposes of the layout, those two places are miles apart and would never actually be in view of each other. I think it'll afford some interesting "railfan" opportunities nonetheless!


This last photo really should be the first, before the ones in the last entry, even. This is the south portal of the tunnel, as viewed vaguely from the hilltop I described above, and, imagining this with plaster shell, scenery, trees, and other elements, I think it's going to be one of the more photogenic locations on the railroad. No hikers in the tunnel, please! The north switch for the Mill will be located approximately in the foreground of this photo.

The rest of the layout has some of the wood framework installed, but will have to have the sidings for the mine and the mill installed before the screen can be applied... though the design of these areas is a lot futher along now that I can see exactly how much room I have to work with, and what I can make work with respect to track geometry. Stay tuned!

Altogether a fantastic week's work! A particular vote of thanks to Paul for making this all possible, and to the folks at work who let me have a couple of days off to participate ... I'm beginning to believe I might just get this thing built after all!

And... I promise, it won't be another eight months to the next update!

Tuesday, July 6, 2010

Moving Mountains

Progress continues on the mountains in the area currently known as "The Canyon" between the north tunnel portal and Midway.


We do, however, have miles to go before we sleep.


There may be more to report over the weekend!

Wednesday, April 7, 2010

A Good Week's Work

After all this time, I guess it's time to write SOMETHING here. It's not the rollout of anything huge, and no photos of the layout yet, but it's been a productive week at last on the Slate Creek.

The hardshell is nearly framed in the "Canyon" area, from the tunnel portal to the large rock cut. Today, I located a source of Hydrocal in Greensboro, and obtained a 100 pound bag, and enough aluminum screen to do the rest of the "crunchy" parts of the mountains in the as-yet-unnamed Canyon area. I have a roll of vinyl screen that will form the base of the somewhat gentler and more uniform hills from the cut through the woods to Midway, and around the corner to where the High Bridge will be (though approaching the bridge, we'll probably be back to metal screen again.) This week's objective was to have plaster cloth up on the canyon section, and I almost made it! At this point, I expect to at least have most of the screen up and maybe some plaster cloth; I may be able to make a larger dent in it next week. If anyone knows an army of tiny people who can reach the far corners of the benchwork, not step on the track in the process, and apply plaster, have them call me! Until then, this is primarily a solo act, and subject to interruption.

** Note: All place titles on the SCRY are just working titles -- once this is finished, I may give them real "Timetable" names. For now, I've got to call it SOMETHING so I'm trying to be consistent in how I refer to these places so as not to confuse anyone.

In other news, I've been working for several years with some good friends on a project to build some passenger equipment with a more modern feel than most commercially available cars or kits. The project was covered over on the Durango Dan site a week or so ago (see link to the left for One twenty point me) and can be seen in depth on Bruce Chandler's website, www.thejoat.com where you can read about the history of the project, and of parlor cars in general. I'll cover mine in detail after it arrives and becomes a project on my own bench -- for now, my car was the test assembly of the kits at Rio Grande Models UK (also see link at left...) and even in its unfinished form is just exciting! Here's a sneak peek...


(That's not the final color...) I have to commend my new friend David Gormley for his fantastic work, and flexibility on this project. When he asked if I'd MIND him assembling mine as a fit-test, I was all too ready to agree, and got him to paint it too ... I'll be doing the detail work, windows, underbody details, and interior once the car arrives here from the UK; Stan Cedarleaf is already putting the decals together for me. One major part of the work will involve scratchbuilding a railing for the observation platform, which should prove interesting. I'm hoping to be able to get most of the other 1:20.3 detail parts commercially (though I already have all of the underbody details.) I'll post updates here as the project progresses.

There's been some discussion lately about the Bachmann Forney. I've got one, and it went from the box to a couple of laps around the track to make sure everything worked, to the workbench. It now looks like this:


As you can see, this is going to be a "roots-up" project, and will entail lowering the cylinders, lowering the body of the locomotive, dealing with the horizontal and vertical seams in the lower part of the smokebox, reconstructing the cab detail, re-engineering the power and control system, and then changing around some of the details to give a family resemblance to another 2-4-4T that's near and dear to my heart in the 1:1 world. I will, of course, post photos and progress here as it happens.

And, there are a zillion other things to do. SCRY #10, a 45 ton diesel, is currently in the shop and will receive the first QSI system on the railroad, followed by Shay #5. There's an enginehouse being built by Randy at PCGRS in California (also in links, left) which will probably come to fruition late in the year, and other motive power and rolling stock projects on the horizon as well.

But first... I need to have a decent "stage" on which these models can perform, so the focus is the layout itself. Hopefully there'll be photographic proof of some progress in that department in the next week or so.

Monday, October 12, 2009

PROGRESS at last!

For the first time in a long time there's some news on the layout itself. The wiring for the new lights is up, and the frames to hold the scenery are installed from the north tunnel portal, past midway, and nearly all the way to the bridge! (of course, you have to think a little fourth-dimensionally to understand where these places are...)

The turntable has a pit, finally, and is visible in the yard. It needs some cosmetic help, and the table may need some reinforcement around it... but it's in, and turns!

There will be photos of all of this very soon, hopefully with some screen work completed too.

Wednesday, July 22, 2009

An Un-Update

It seems like forever since I've written anything here. Hopefully, that'll change soon, but for now, suffice it to say there's a lot in the works. There's an enginehouse in the design stage, Slate Creek #10 will soon undergo a ground-up rewiring and power / sound system change, I'm working out the final details of the turntable mounting (note that it NEEDS to be in place before the enginehouse arrives,) and oh, yes, the 2-6-6-2 is still awaiting some engineering rework as well.

Then, also, with any luck, we'll have new lights in the basement, so visitors can actually SEE the railroad....

Lots of new and interesting projects on the horizon! Now if I can just get some done enough to take photos, this will be a much more interesting blog to follow.


This photo is from a few years ago, when Gaetan Charette and Nicole came by, and we hit all of the local railroad hot spots... Tweetsie, Doe River Gorge, Spencer ... of course, Cass is something of a stretch to be considered "local," but that's not the point! Gaetan, as well as Bruce Chandler, Doug Matheson, and yours trule also make up a group of folks with a very special 1:20.3 project several years in the making that may turn up here very soon as well!

In any case, stay tuned!

Tuesday, March 17, 2009

Davenport Rollout

Those of you who saw the photo contest results on Durango Dan's One Twenty Point Me site have seen the first public appearance of Slate Creek Railway #2, the 10 Ton Davenport we've been talking about here since November. I particularly liked the engine that won second place, as I've been considering building something similar for some time now, but I was both pleased and surprised to discover I'd placed in the contest as well.

It's been quite a ride, as you can see in all of the previous posts, from delivery, to teardown, to sandwiching all that gear under the hood, to trying to get everything to function, this little engine has turned into a BIG project. But, even with the external detail changes being somewhat small, the difference is noteworthy, I think:

Before

After


While I still have some more weathering to do, and an antenna issue to work on, this is pretty much what the locomotive will look like from now on. For such a small locomotive, the hours it took to change everything were more than I ever would have guessed... here's a list of "projects" that went into this tiny unit:

a.) Removed factory electronics, and installed RCS radio control, Phoenix P5 sound, P5T interface, and 12 Ni-CD batteries under the hood, the radio under the rear frame, the speaker under the front frame, and the charge jack in the rear wall of the cab.

b.) Removed the Bachmann supplied seat, raised the control stand, and reworked its controls. Added a gear shift lever, clutch, and a new "fold down" style seat in the cab, as well as a pull and valve for the air horns. Also built and added a "sand box" on the fireman's side to match up with the sand fill cover made to cover up the charging jack in the back wall of the cab.

c.) Added the sand fill cover, air horns, and bell, and bell rope. Added the headlight in the rear wall of the cab, and wiring. Also removed the factory stack, and built a replacement one, and replaced the front headlight with a smaller one that looked more the right size for a loco this size. (The one that comes on it is the same as the electric headlight on the 2-8-0!) And, I rebuilt the front end of the locomotive, covering the radiator with HO scale aluminum siding so that the radiator fins would all be horizontal, and removed the handrail supports from the radiator. I made a new grill from brass angle and rod, and added bolts, and a screen to finish it up (the screen was actually some kind of brass decking in HO scale, I think, but it was available in sheets from the LHS!) Oh, and I'm particularly proud of the smokestack; after drawing out what I wanted to do with the front end several times, I was having trouble finding something that "looked right." I looked at toys and truck models, and nothing looked quite right... then I looked at the pen I was drawing with, and realized, if I cut it down, and pulled out the rubber grip....


d.) Finally a set of Slate Creek decals, and some weather treatment to take off the "shine" ... though I'm planning to do more in the weather department in the future.

I'm very pleased with how it came out, particularly since it's my first total conversion/bash/detail project. It will be interesting to see what's next!


I'll sign off with a couple of other photos...

Wednesday, February 18, 2009

We're Still Here!

It's been awhile!

Somewhere between the holidays and everything else that was going on since my last post, things on the railroad and in the shop have fallen seriously behind, but that's all changing rapidly.

Stay tuned for the "finished" posts on the Davenport (really, I mean it!) Just a little more tweaking and testing, and I'll be ready for a "rolling out!"

I've got to. Something BIG is headed for the Slate Creek shops, and it'll take up the whole shop once it arrives ... I have to make room!

Hopefully this will be a bit more exciting place to visit in the coming months!

Thursday, December 18, 2008

Almost There

Yes, I know. Christmas is coming too ...

My "To Do" list on the Davenport (post electrical/mechanical) is down from about 25 items to about a dozen:

Build/Install front and rear headlight lenses
Build sandbox covers.
Install horn and bell pull cords.
Clean and reinstall cab on locomotive
Install radio on locomotive, connect antenna.
Install bell on hood and horns on roof.
Connect front, rear headlights.
Build muffler, remove old smokestack, install new muffler on hood.
Install hood.
Modify radiator & Build grill guard, reinstall
Build and install flag holders, or match paint and cover old hood slots.
Add decals, other graphics, and Marcus.
Test.

And, I think I may see what I can find in the large diecast toy section of Tractor Supply to save me building a muffler... some of theirs are quite detailed, and should work nicely in 1:20.3 for a smaller stack.

I had hoped this post would wave the "FINISHED" banner ... but I'm spending my day dealing with a main drain clog (again,) and may therefore end up delayed for a few days!

Matthew (OV)

Tuesday, November 25, 2008

Vital Signs

As of today, the major electrical work on the Davenport is finished.

This tiny locomotive now sports 12 NiCd batteries, an ELITE throttle by RCS, and a Phoenix P5 sound system, as well as a P5T interface board, and all of the requisite wiring to make them all work, under the tiny hood.

The power switch is under the rear frame of the locomotive, as is the radio receiver. The small speaker will fit in front, between the frames. The charging jack will go in the rear cab wall, and be disguised by a sand box / cab seat on the inside, and either a sand fill or a handbrake on the outside. I'll go more into the cosmetic details next time, when I have photos to show how they're progressing... the big news TODAY is that other than connecting the headlights, the electrical work on this locomotive is FINISHED!

The first trial fitting of the various components was not especially encouraging (and, I'm told led to indigestion in some quarters!) There seemed to be no way to fit everything in ... and more wire than a local telephone exchange!


I found the best way to overcome the "octopus" the project seemed to be swallowed by was to remove all of the extra wires from the Phoenix and P5T ... there are several extra wires pinned into the plugs that aren't needed for what I'm doing here. I also shortened up harnesses where possible, and then connected what was left in neat, organized bundles. With the battery pack modified from its standard 4-4-4 arrangement to a top row of 4, a middle row of 5, and a bottom row of 3 cells, I found I had room for all of the electronics on top (including the Phoenix P5 at the extreme rear of the hood, vertically,) and sufficient clearance for the worm and gears underneath. With the battery secured to the right hand side of the hood, there was a space along the left that accomodated the P5T, and all of the bundled wires, as well as the volume switch. With the "Octopus" gone, everything finally fit in a functional, if crowded, way.


Much better! The programming port can be removed by unplugging it from the board once the board has been programmed ... which I did (though not before taking the photo above, apparently.) All that was left was a full scale test ... and I'm happy to report everything started up and ran like a charm... both sound and motor. The speaker in the above photo is a full size Phoenix speaker, and I used it just for testing -- the actual speaker is much smaller and will fit between the front frames, and ahead of the power block.

Now to finish up, there's still lots of cosmetic work to do, as well as final re-assembly, and cleaning up all the debris and marks that a major surgery like this always leaves ...

But today, it's alive! ALLLIIIIVE!

Wednesday, November 19, 2008

Getting There (Much like the Tortoise...)

No photos yet... but for folks looking for progress, there is progress!

The electronics are almost finished. The locomotive now has an RCS ELITE throttle, Phoenix P5 sound card, a P5T interface, radio receiver, charging jack and power switch all installed. I'm waiting for a speaker for the Phoenix to be delivered. The hood and the lid are both on the frame, and taped in place while the RTV that holds the battery pack in place sets up; this is somewhat delicate, as everything fits, but only just. The new headlight and horns are ready to go, the rear headlight has been fabricated, and once I have some styrene and brass in hand (and some JB Weld!) I'll be able to finish things up. Oh, and I'll need to charge the battery ...

Stay tuned. I expect more, and photos soon.

Tuesday, November 11, 2008

Fully Apart

In an effort to keep this series in order, today's update shows the fully stripped down frame of the Davenport.

You can see the cavity in which the motor mounts; there are two "D" shaped brackets on the motor that allow it to be screwed into the bottom of the large metal "hump" that takes up the center of the cab area. Removing the one at the non shaft end allows the motor to come completely out. And, any earlier questions about the frame are answered; the black and gray areas are all one piece and the "hump" is an integral part. The whole frame is metal, by the way, which makes gluing and drilling a little different from what you might be used to on a plastic locomotive! Here also you can see the bottom end of the power truck, consisting of the gearbox and axles. It's held to the bottom of the deck by four standoffs that are cast into the floor, and when removed has a strange strong resemblance to an HO power truck (only much larger.) Now, the trick will be to get all of the various components arranged and mounted, and the wires between them run, and organized. It looks like the power switch and radio receiver will go under the cab between the frame rails, and the speaker will go up front under the frame just below the factory supplied speaker grille (which has beene removed.) Everything else has fit under the hood, and the standard rear charging / aux power jack will be concealed on the fireman's side of the cab, and will resemble a sand fill and sand box with a seat on top. I plan to redo the engineer's side of the cab somewhat, as I'm not thrilled with the size or position of the factory control surfaces. We even have an engineer enroute from Hawaii to take charge of things once the unit is operational (thanks Richard!) although I suspect he may have to be temporarily assigned to K-27 duty ... and it may be hard to get him to step down to the little 10 tonner after that!

Stay tuned ... there's more coming!

Tuesday, October 28, 2008

Crossing the Rubicon

After lengthy discussion with Dave Goodson, I've decided that Slate Creek #2 will be converted to Battery Power and Radio Control (by RCS) here in the Slate Creek shops. Dave will be chief technical advisor, and will hopefully prevent me from blowing anything up along the way!

Here's what the Davenport looks like with the top off the hood, and the Bachmann circuit board removed. There are three plugs on the circuit board; one for the headlight, one for the power IN from the track, and one for the power OUT to the motor. Removing these, and four screws, and we can see what's underneath.

The large silver object is actually a stack of eleven metal plates that are notched to allow space for the worm gear and the gear it drives on the gearbox, which is attached from underneath as part of the truck. The front of the plates have a roundish bite taken out of them, which corresponds with the round speaker mounting underneath; you could put a small speaker here, and half of it would have a grille to the outside, underneath the engine, between the frames.

Removing the weights we can finally see all the way to the bottom of the hood space. Note the gear oil all over the place, and the channels that the motor wires pass through to get to the motor. This gives you an idea of the space we're going to have to work with to install batteries, radio receiver, throttle, and sound equipment. Needless to say, some creativity is on the horizon ....

To properly arrange everything, though, the rest of the locomotive needs to come apart, so we can see what space there is to work with, and what other obstacles may present themselves. The cab is held on by two screws at the front, and an odd arrangement of two screws that hold tabs in place that mate with locking tabs on the back of the cab... removing the screws, one can remove the plastic "pins" and the locking tabs can slide upward. There are four screws that hold the hood in place. That leaves us with the bare frame of the locomotive. Now you can see the "grey area" that appears as the cab floor and the surrounding black painted area that makes up the rest of the deck. While the sides of the "frame" are screwed on from underneath, the deck itself is a single massive cast piece that includes the "grey area" and the large domed "hump" that would presumably represent a huge transmission on a gas-mechanical loco like this one. The motor is actually accessed from underneath; removing the power truck (from the primary gears down, it comes away in one piece) exposes the plate through which one has access to the two brackets that hold the motor in place. (I haven't removed the truck yet, so while you can see the motor access "hatch" you'll have to wait for the next installment to see inside!)

So the plan is, now, to tackle the following laundry list:

1.) The battery/radio control/sound gear is in transit... when it arrives I will need to find a way to fit it all inside the locomotive.

2.) My new headlights have arrived, and are much more like what I had in mind for this locomotive. I will add the headlight, modify the hood to accomodate them, install one in the rear cab wall, modify and install the horns and locate a bell, and decal the locomotive all while it's apart. Oh, and I plan to move the grabiron standoffs from their unusual placement on the radiator to either side of the radiator as they should be ... and I may make a grille guard for the radiator itself.

3.) The seat in the cab bugs me. It appears to be too small for most of the 1:20 people I've met, though that tiny Sherman Pippin found in some of the earlier Bachmann locos might be comfortable. So, I'm going to rework the controls and seat along the lines of a "Big-n-Tall" accomodation ... anyone who thinks I may have a personal stake in that approach ... I have no comment at all as to whether I'm thinking of a 1:20.myself in that cab when I think this way!

4.) At that point it'll be time to reassemble and test. Stay tuned for that, and everything in between!

Thursday, October 23, 2008

New Motive Power


The big brown truck brought what will soon be Slate Creek Railway #2 today. It's a Bachmann 1:20.3 Davenport (Gas-Mechanical) and there are a lot of really great things about it. The frame appears to be made entirely of metal, and it's quite heavy for its size. That said, it's kind of odd that the grabiron supports are located ON the radiator instead of on either side, and the seating in the cab might accomodate a third grader, but any large crew members (like the SCRY founder, for example) are going to require some other arrangement. The headlight is just ... well, huge... so I'll have to find a better one for up front, and fabricate one for the back as well ... and I suspect we'll also need to add a horn and bell so she's legal on the main line, if needed. Otherwise, add some graphics, and we're ready to go. Well, almost. It looks as if this little pint sized locomotive may be about to pose a challenge for the west coast battery guru -- stay tuned for what we learn from THAT!

Sunday, October 12, 2008

Been Awhile

It's been awhile since anything happened here, because I've been away from the Slate Creek for over a month. What started out as a short trip to give my Mom a few days off from caring for Dad turned into a month long trip to help her take care of him in his last days, until he passed away on October first. My heartfelt thanks for all the support, prayers, and notes everyone sent during that time.

Look for some fresh railroad material here in the coming weeks as life returns to "normal" around here.